
By American Mural
5 min read

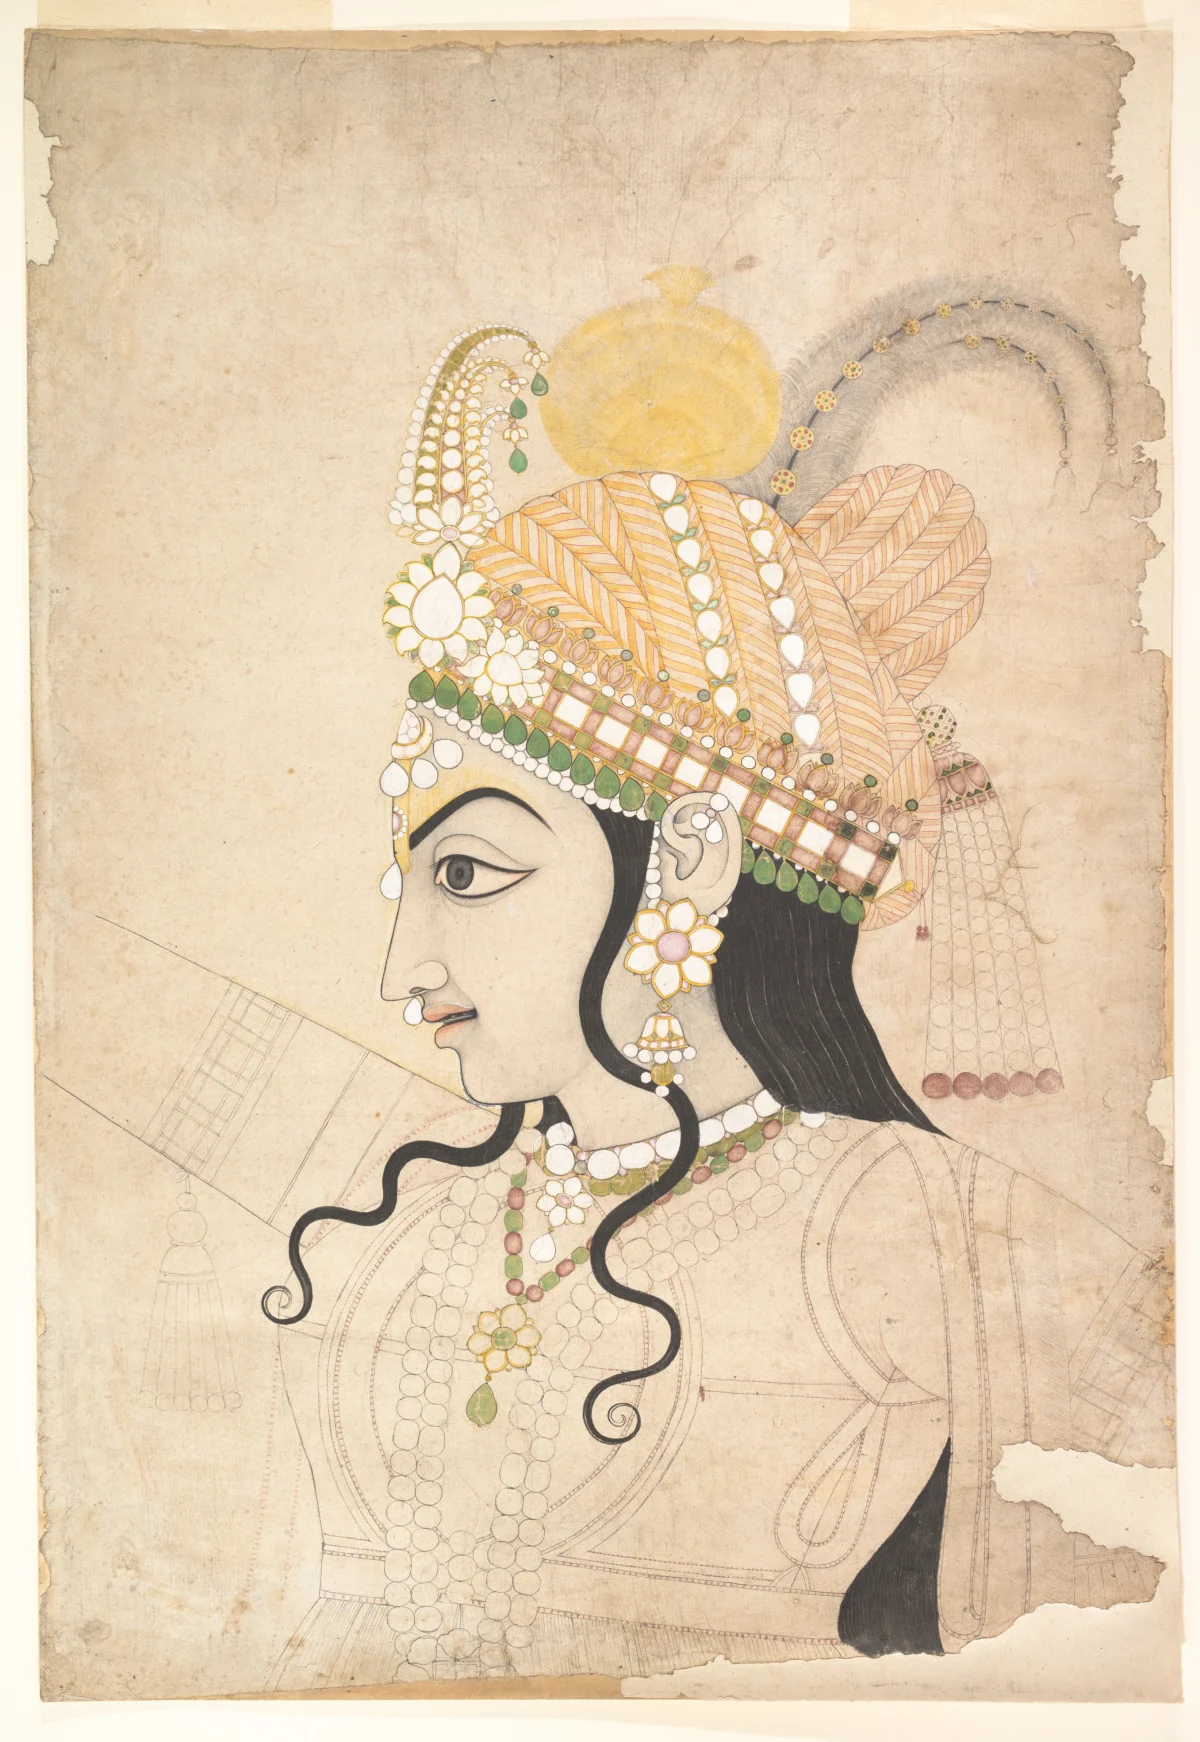
A finished drawing may fit on a laptop screen or a sheet of paper. The wall may be forty feet wide. Before painting begins, the muralist needs a reliable way to move that small drawing onto the full surface without losing its proportions.
There is no single best transfer method. The right one depends on the wall, the design, the available light, the equipment on site, and how much of the drawing needs to be exact.
Pouncing starts with a full-scale drawing, traditionally called a cartoon. The artist perforates the important contours with a needle or pounce wheel, holds the paper against the wall, and taps charcoal, chalk, or another fine powder through the holes. When the paper comes away, a dotted outline remains.
The process is also known as spolvero. The National Gallery of Art’s materials guide describes the same basic sequence, and surviving cartoons show how widely it traveled. The watercolor shown with this article, a mural cartoon attributed to Sahib Ram, still carries the tiny holes used to transfer its outlines around 1800.
Pouncing is useful when the drawing needs to arrive on the wall at full scale and when a pattern may need to be reused. The tradeoff is preparation time. Every line that matters has to be perforated. Electric pounce tools can speed up that step, but the principle is unchanged: make the holes, position the pattern, and transfer the drawing as dots.
A cartoon can also be traced with a pointed stylus. On fresh plaster, the pressure leaves a shallow line in the surface. The Getty’s discussion of Michelangelo’s drawing process explains both approaches: a design could be transferred by incising its outlines or by pricking and pouncing them.
Incising belongs most naturally to fresco and other surfaces soft enough to take an impression. It is direct and efficient, but less forgiving than a powder line. Once a groove is pressed into plaster, it becomes part of the surface. The painter also has to work within the plaster prepared for that day. The Met’s overview of Renaissance drawings shows how full-scale cartoons and moist plaster shaped that workflow.
The proportional grid avoids a full-scale paper pattern. The artist divides the small drawing into squares, lays out a larger grid on the wall, and copies the design one square at a time. A Getty publication on historical transfer methods describes the same square-by-square enlargement alongside pouncing and stylus tracing.
The grid needs little specialized equipment and can scale to almost any wall. It also leaves more interpretation to the painter. Curves and long gestures have to stay coherent as they cross from one square to the next. For that reason, a muralist may use the grid for the main composition and a more exact method for faces, lettering, or other critical details.
A loose contemporary variation replaces the regular grid with reference marks. The muralist marks the wall, photographs it, and overlays those marks on the digital design. Back on site, the marks act like landmarks rather than boxes.
Projection places the drawing directly on the wall as light. The muralist adjusts the scale and position, then traces the image with pencil, chalk, or paint.
Artists were using this approach earlier than people sometimes assume. A Works Progress Administration photograph from about 1938 shows Louis Ross painting a mural for the World’s Fair with an image projected from a slide as his guide. Digital projectors made the setup more flexible because the source file can be resized, repositioned, and corrected before tracing.
Projection can move quickly, but the site controls whether it works. The image needs enough contrast to remain visible. The projector needs power, a stable position, and sufficient throw distance. Outdoor work often has to wait until evening, and a person or lift crossing the beam can interrupt the drawing.
Passthrough headsets offer another option. We have tested workflows that place a digital drawing over the visible wall inside the headset, allowing the muralist to trace sections without a projector or a darkened room.
This is promising, but it is not automatic. The overlay has to be scaled and registered carefully, and the artist needs to check that it has not drifted before committing long lines. Battery life, headset comfort, wall geometry, and the size of the work all matter. In practice, the headset is most useful for transferring the drawing; it does not need to stay on during painting.
The design usually makes the decision clearer. Lettering and repeated ornament benefit from a precise reusable pattern. A loose landscape may be faster to grid. A projector is efficient when the wall can be darkened and the equipment can sit far enough back. A headset can help where a projected beam is impractical, provided the registration is checked carefully.
The transfer is not the artwork, but it sets up everything that follows. A clean drawing gives the painter room to focus on color, edges, texture, and the way the mural reads from across the space.